Learn how to integrate Circle’s SDK to build a robust paywall using on-chain USDC payments. Unlock the potential for seamless, secure revenue
Learn how to integrate Circle’s SDK to build a robust paywall using on-chain USDC payments. Unlock the potential for seamless, secure revenue
In this article, we’ll look at how to create a fully functional Next app that implements USDC payments. Our app will allow token-gated content—that is, premium content that will be shown to the user only after they make a payment in USDC. This is an easy, and common, use case for accepting these digital dollars.
Integrating USDC Into Your Payments Stack
USDC is a stablecoin (think “digital dollar”) that comes with all the advantages of cryptocurrencies plus all the advantages of a stable global currency. USDC allows you to send and receive money in a near-instant, at near-zero cost, to more people in more places.
Integrating the ability to accept USDC into your current stack is a perfect way to future-proof your architecture and ensure that you are ready for the next generation of payments. And with the libraries available from Circle, integration is straightforward.
So let’s build a full-fledged app that takes advantage of USDC and all it offers. We’ll create it using the Circle libraries, the open-source Web3 library wagmi, and the popular React framework, Next.js.
How To Create an App With a USDC Paywall
Prerequisites
For this tutorial, you’ll need the following things:
- A MetaMask wallet with at least 0.01 ETH and at least 1 USDC on the Goerli testnet
- A Circle Sandbox Developer Account and API Key
- Node and NPM installed on your local machine
As mentioned above, this setup was all covered in the first article.
Step 1: Create a Next app and install necessary packages
First let’s create a boilerplate Next app using `create-next-app.` We’ll also need to install the following packages:
- @circle-fin/circle-sdk: To access Circle API endpoints from the app
- @types/uuid: To create UUIDs (required for creating payment intents)
- wagmi: To implement connect wallet functionality
To do all of the above, run the following commands in order:
$ node -v && npm -v
$ npm install create-next-app
$ npx create-next-app circle-app
$ npm install @circle-fin/circle-sdk @types/uuid wagmi
$ cd circle-app
$ npm run dev
When creating the Next app, accept all defaults except for the modern app router. If all goes well, once complete you should see a template page when you visit localhost:3000.
Step 2: Add the Circle API
Open your newly created circle-app in your favorite code editor (for example, VS Code). In the root directory, create a new folder called data.
Here, create a new file called constants.js. This is where you will add your Circle Sandbox API key.
// Circle sandbox API key
const circleSandboxApiKey = "< CIRCLE API KEY >";

export { circleSandboxApiKey }
Step 3: Create the connect wallet functionality
Now let’s implement the ability for a user to connect their wallet to our app. We’ll do this using the wagmi library. The wagmi library is a collection of React hooks for Ethereum. It makes it easy for us to do things like connect to a wallet, display balance information, sign messages, and more.
Note that our app will only connect to the MetaMask wallet. If you want to support other wallets such as Coinbase, you can check out the documentation to see how.
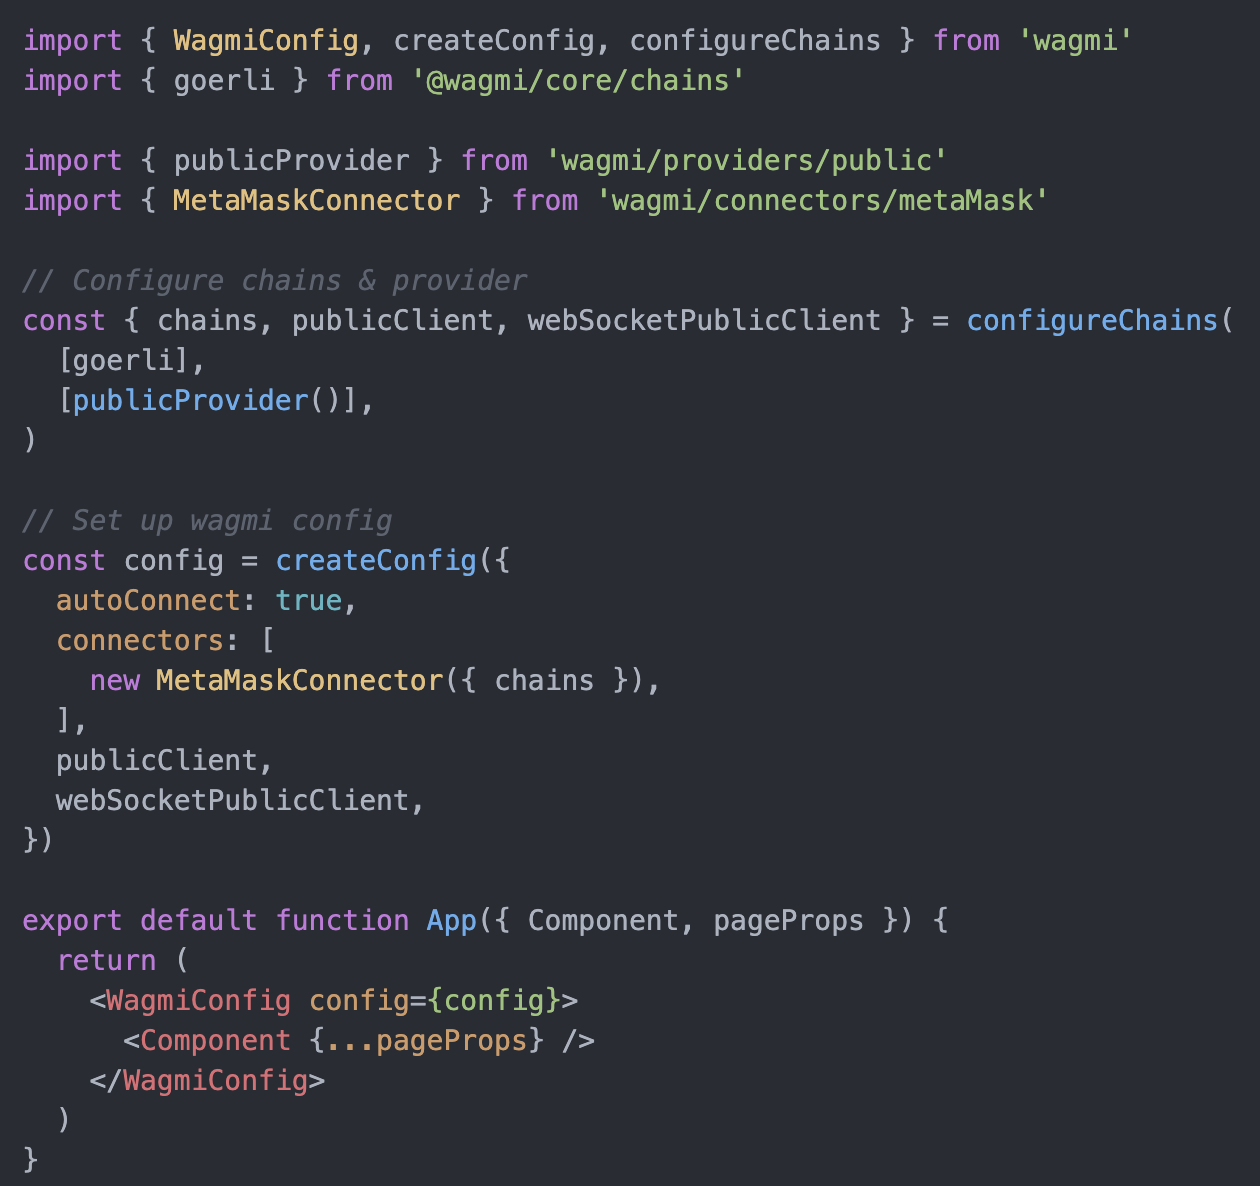
In pages/_app.js, add the boilerplate configuration code:
Next, create a new file in the pages folder called connect.js. The main connect logic will reside here:
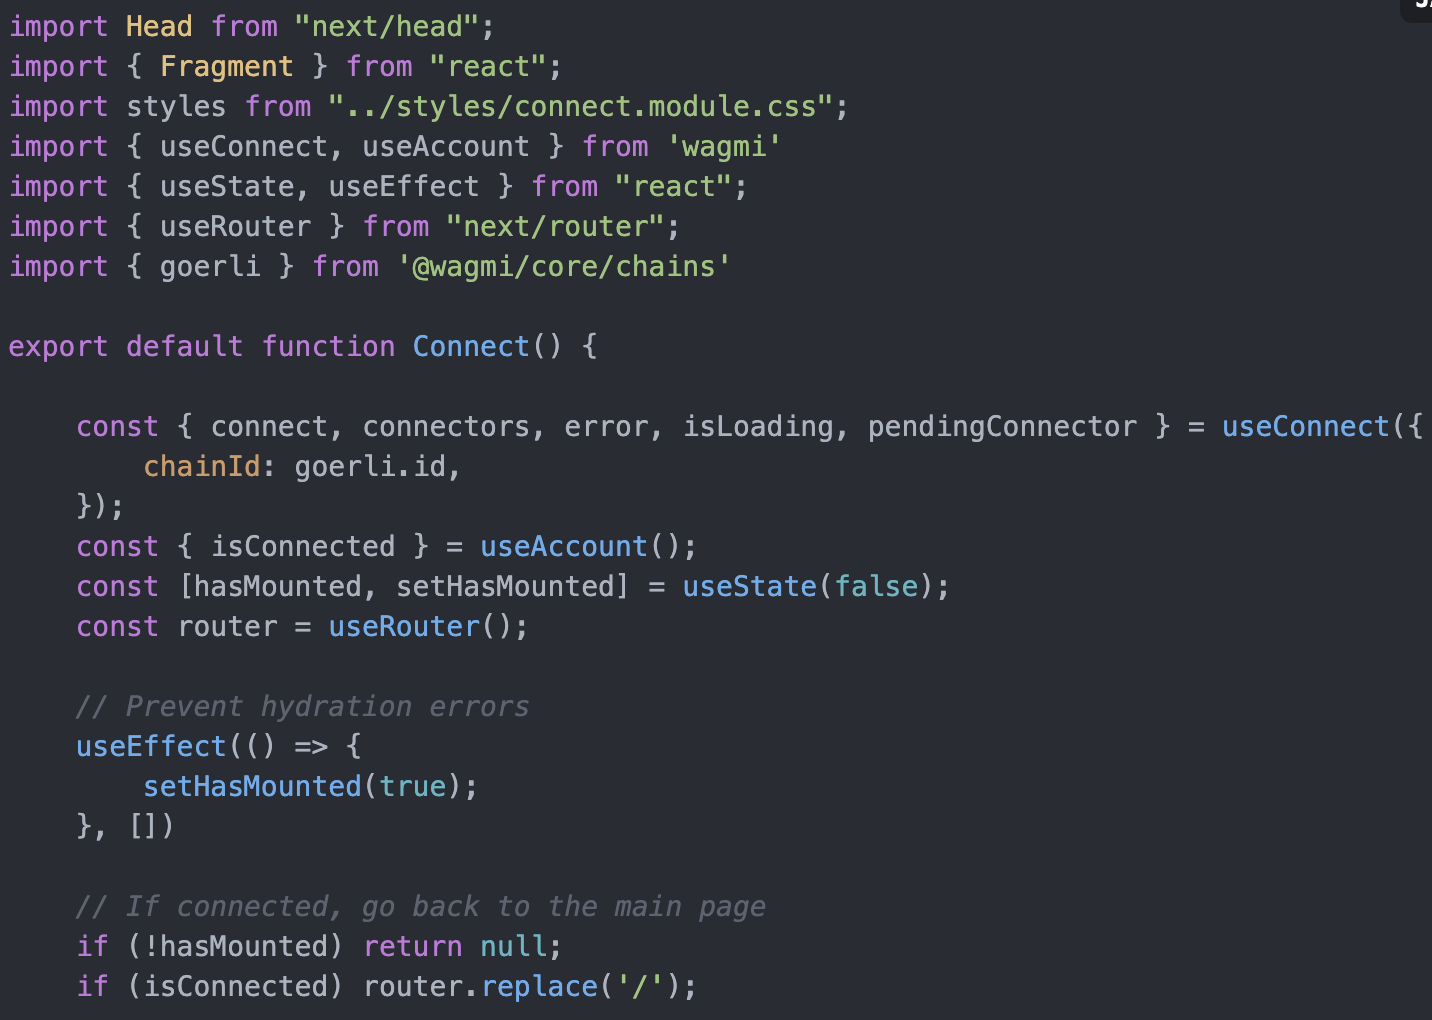
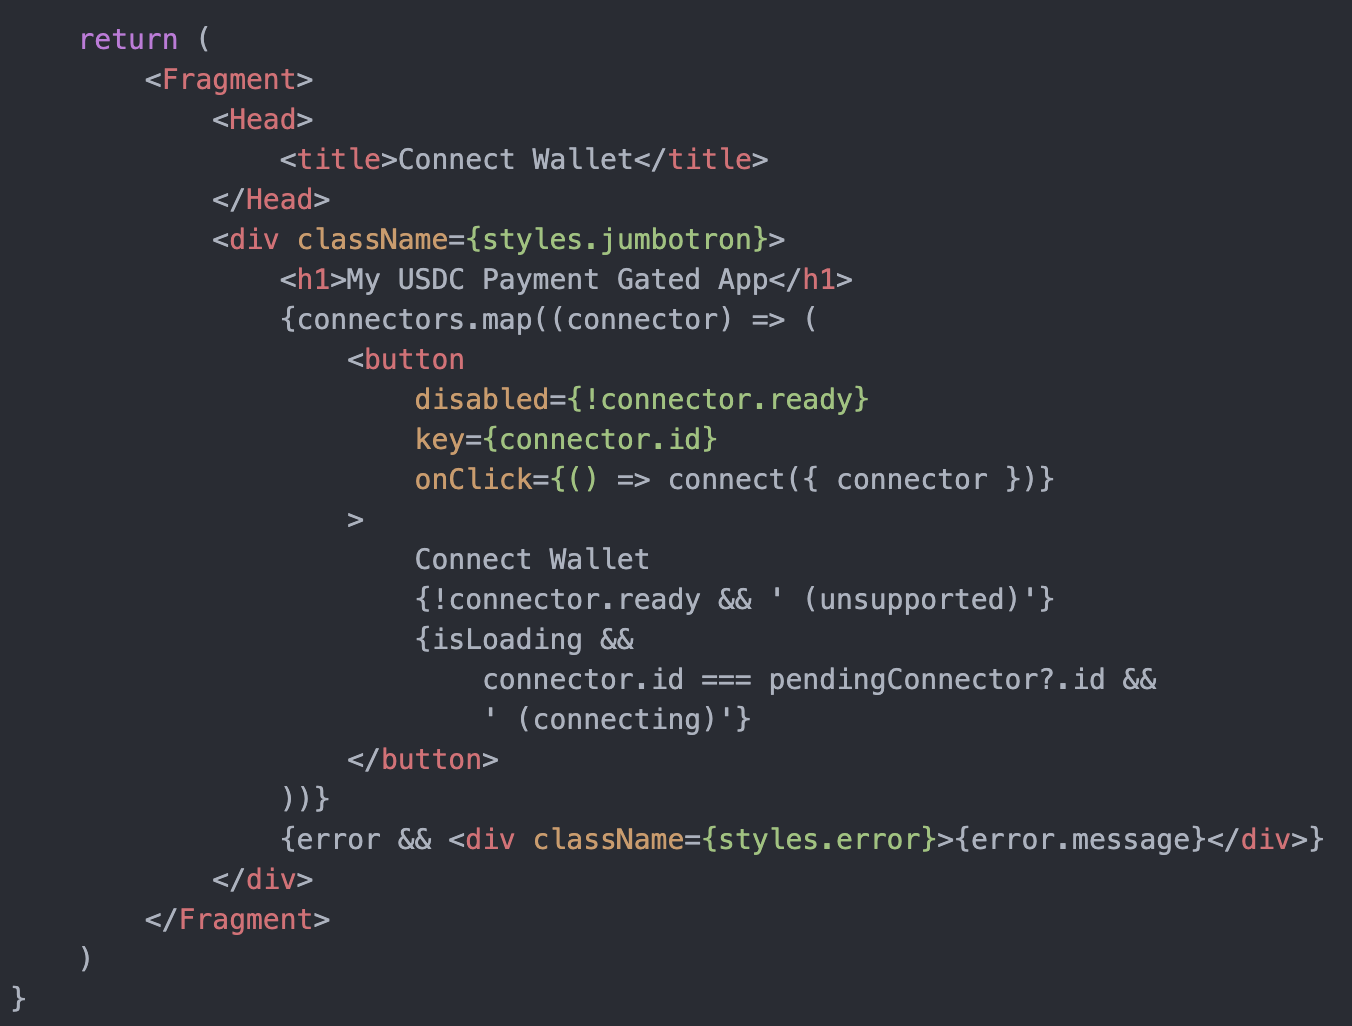
This code is mostly boilerplate and self-explanatory, so we won’t cover all the details here. Basically, we’ve implemented a flow where if someone is not connected to our app, they are redirected to the /connect page and asked to connect using their MetaMask wallet.
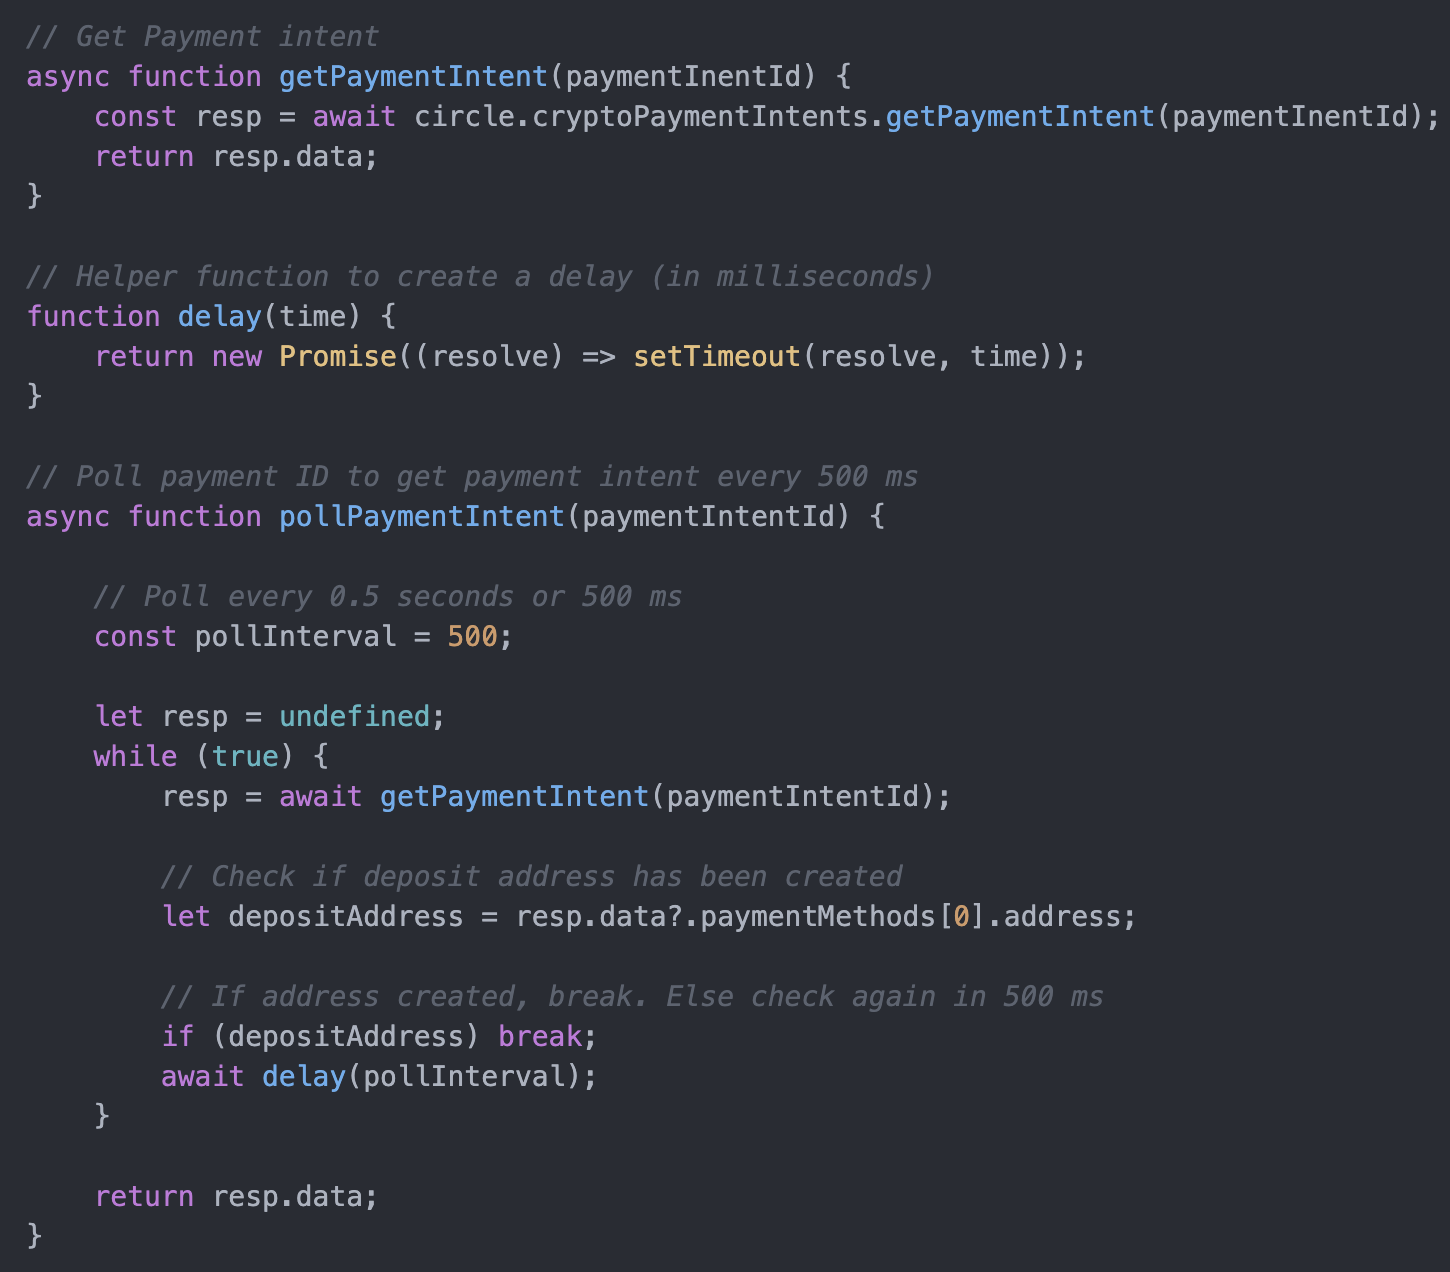
Step 4: Create the Circle SDK helper functions
Now let’s move on to the more interesting code which is specific to our use case. In this step, we’ll implement two major pieces of functionality:
- Creation of payment intent and a corresponding deposit address
- Ability to check if a payment associated with a particular payment ID has been made
The details of these features were covered in the previous tutorial, so they should look familiar. The main difference here is that we’re creating an actual app and using best practices for a frontend framework using Next.
First, in the root directory, create a new folder called utils. Add a new file called payments.js and add the code to implement creation of payment IDs.
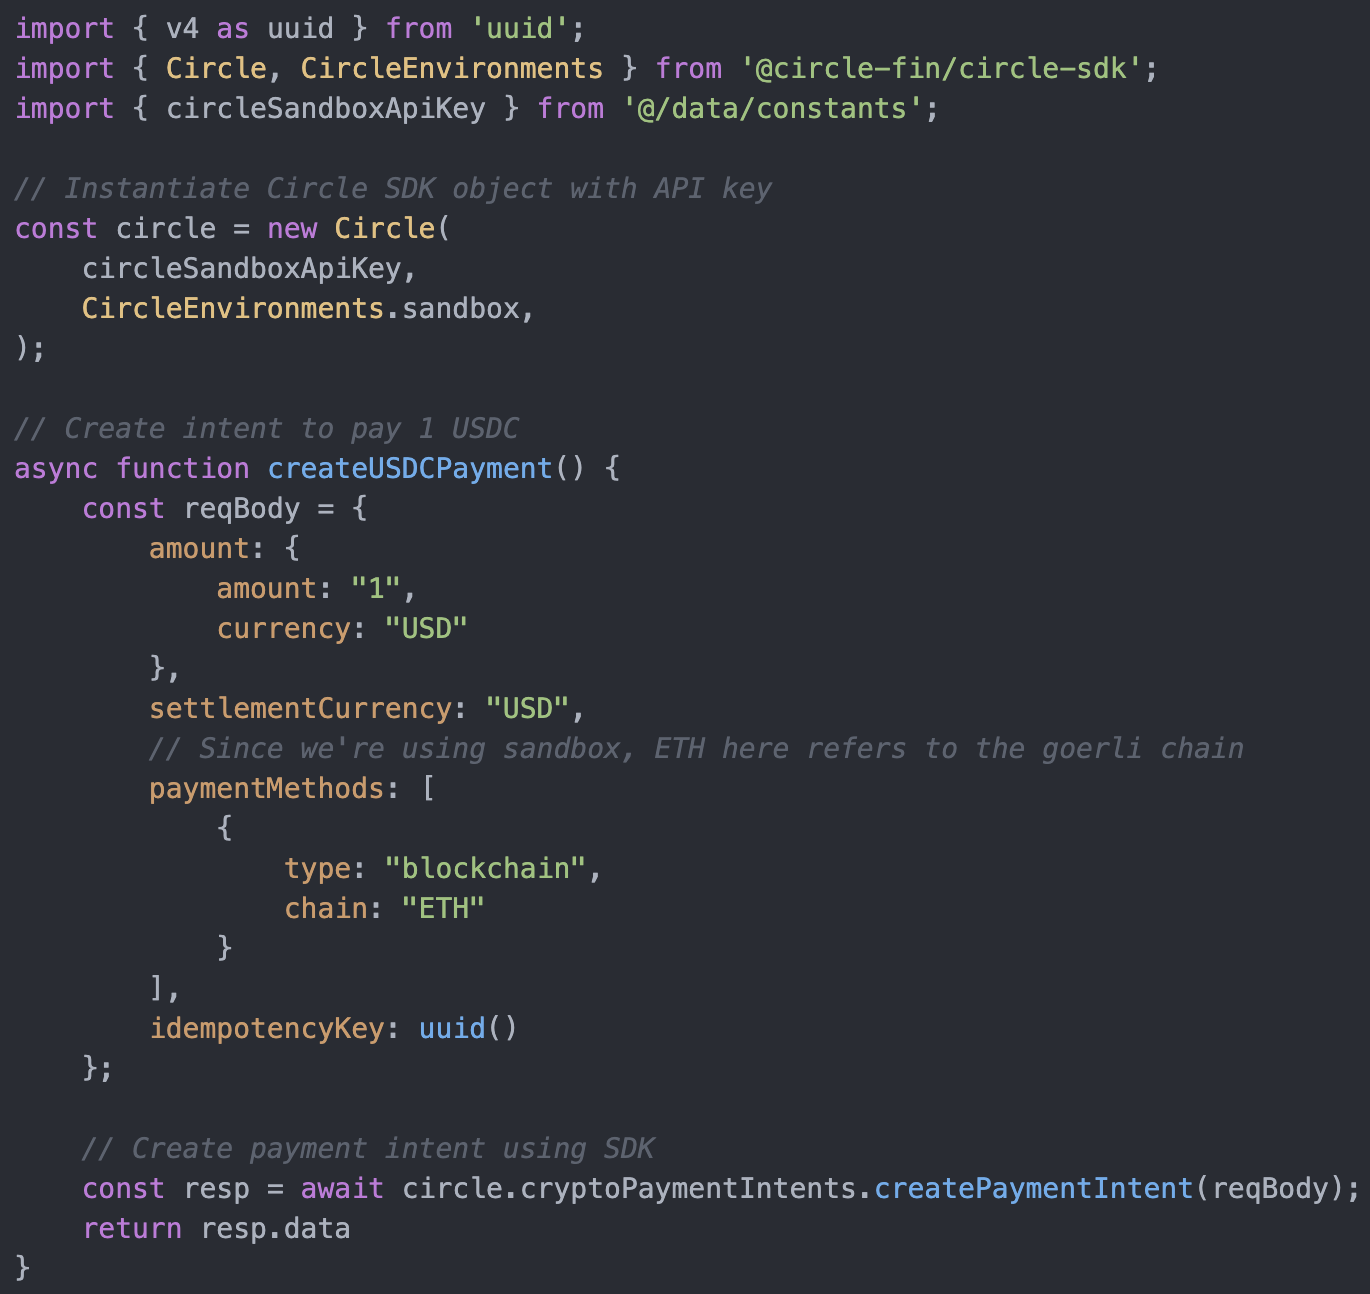
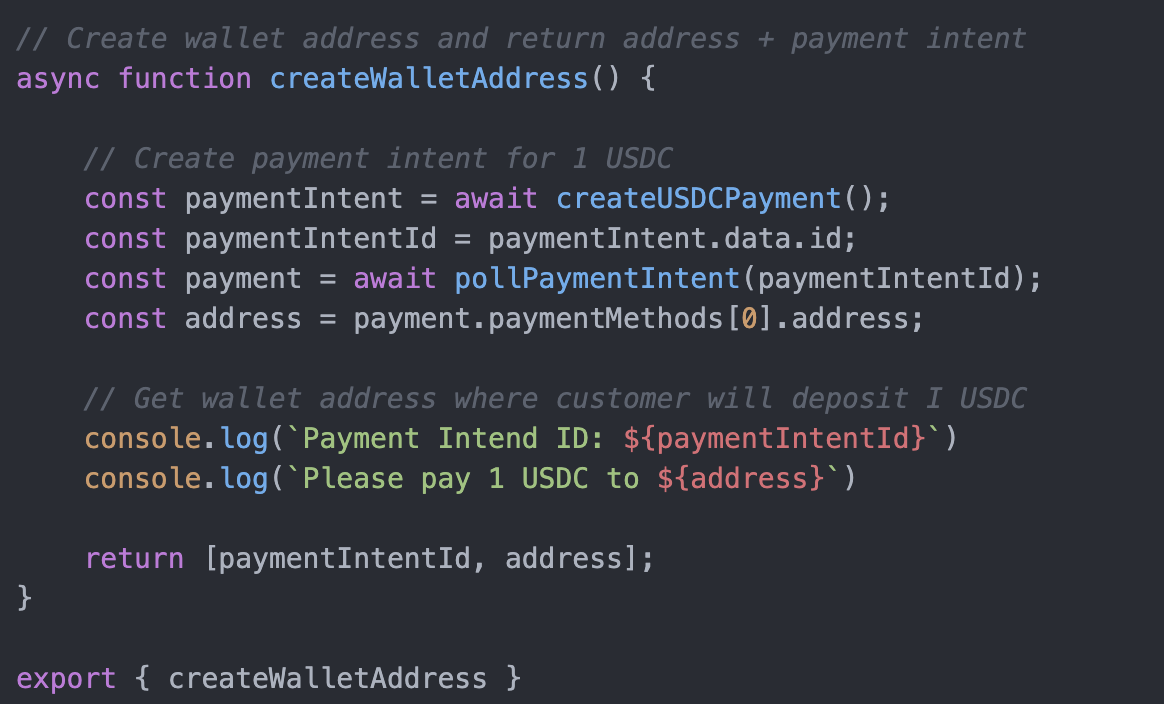
This code should all be very familiar.
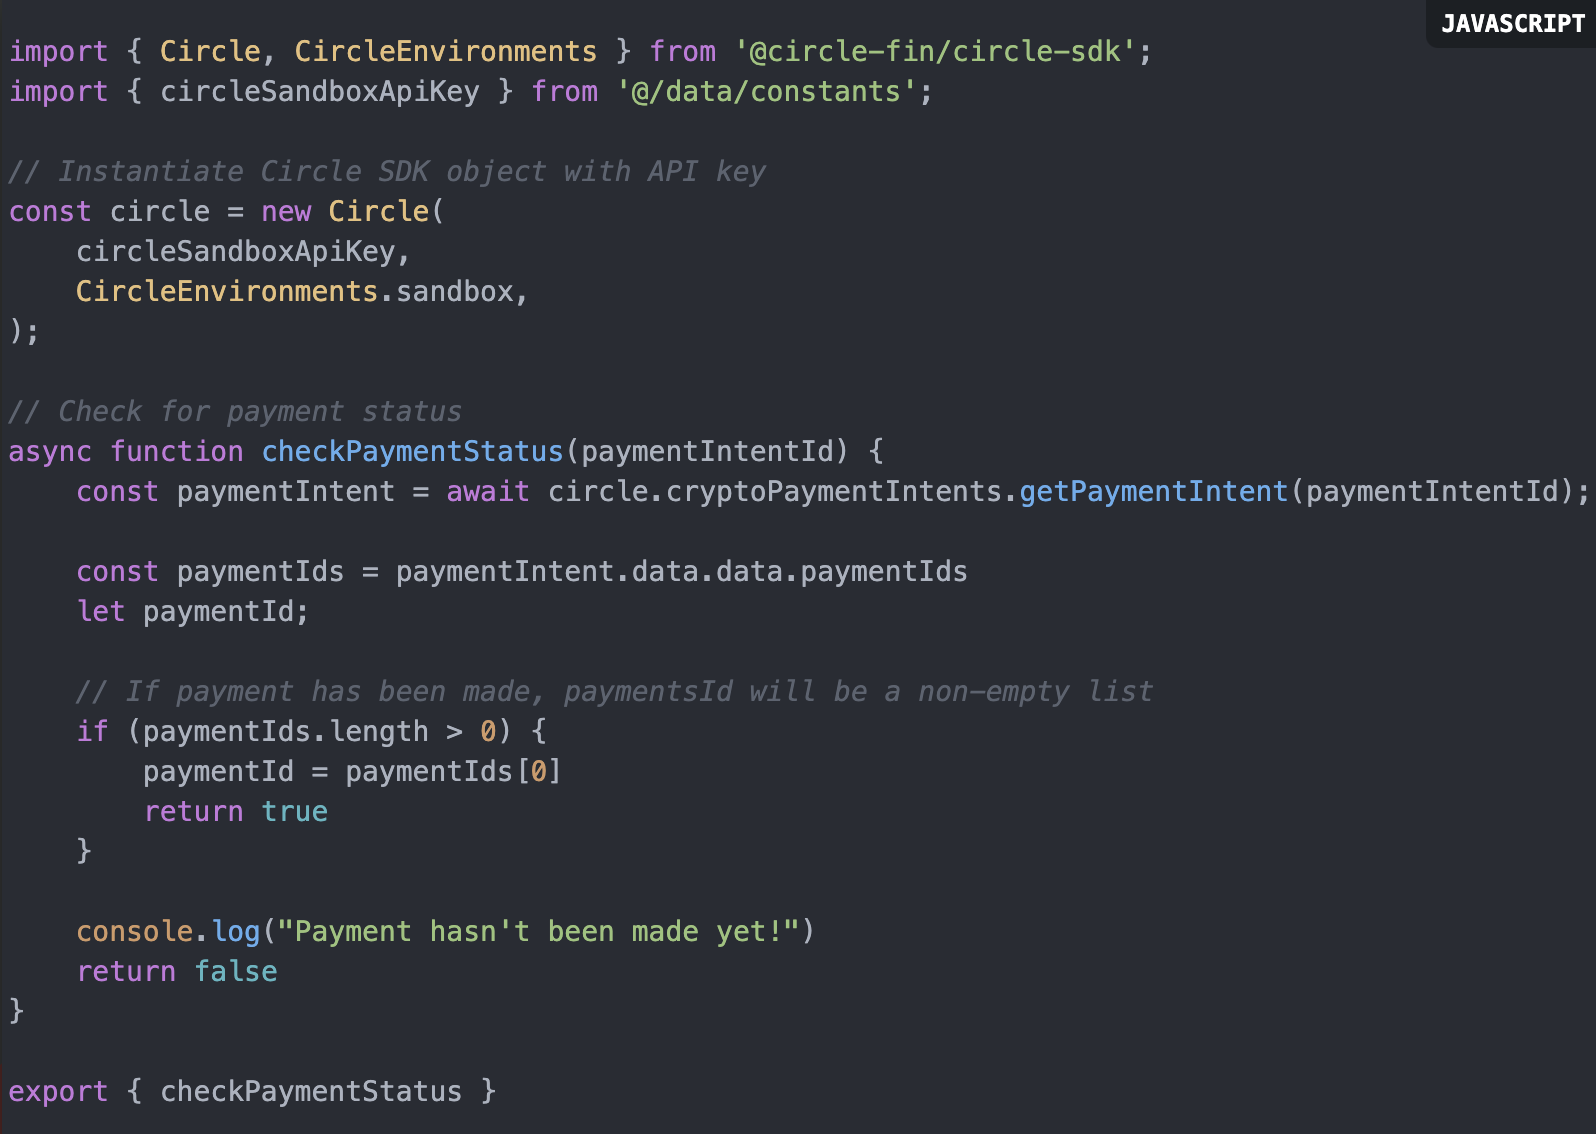
Now in the same folder, create another file called confirmation.js where we add the logic to set the status of payments.
Step 5: Write the core app logic
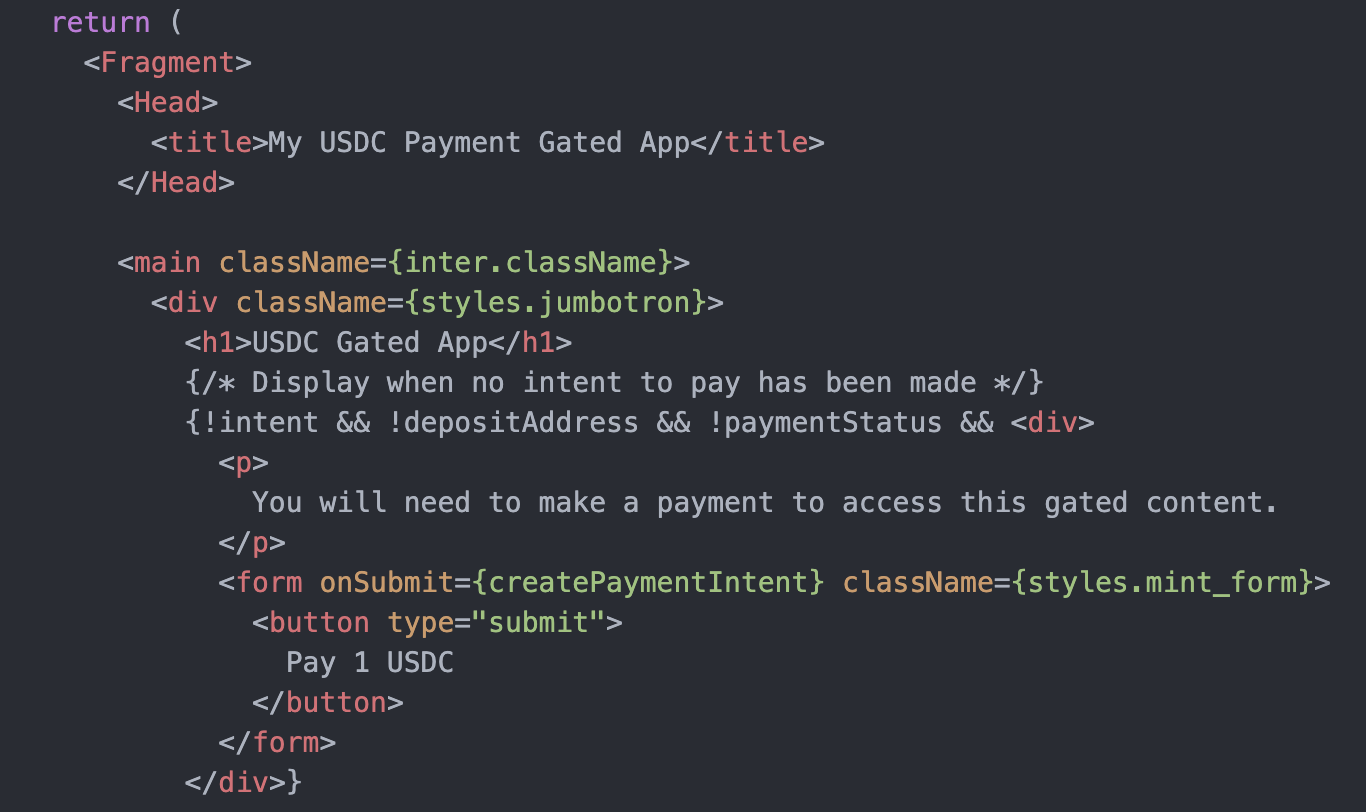
Now that we have all the pieces in place for us to code our main app logic, the flow for our app will be:
- If the user is not connected to the app, they are redirected to the /connect page.
- Once connected, the user is redirected to the home page and informed that the content is gated and they must first make a payment.
- When the user clicks the Make Payment button, a payment intent is created.
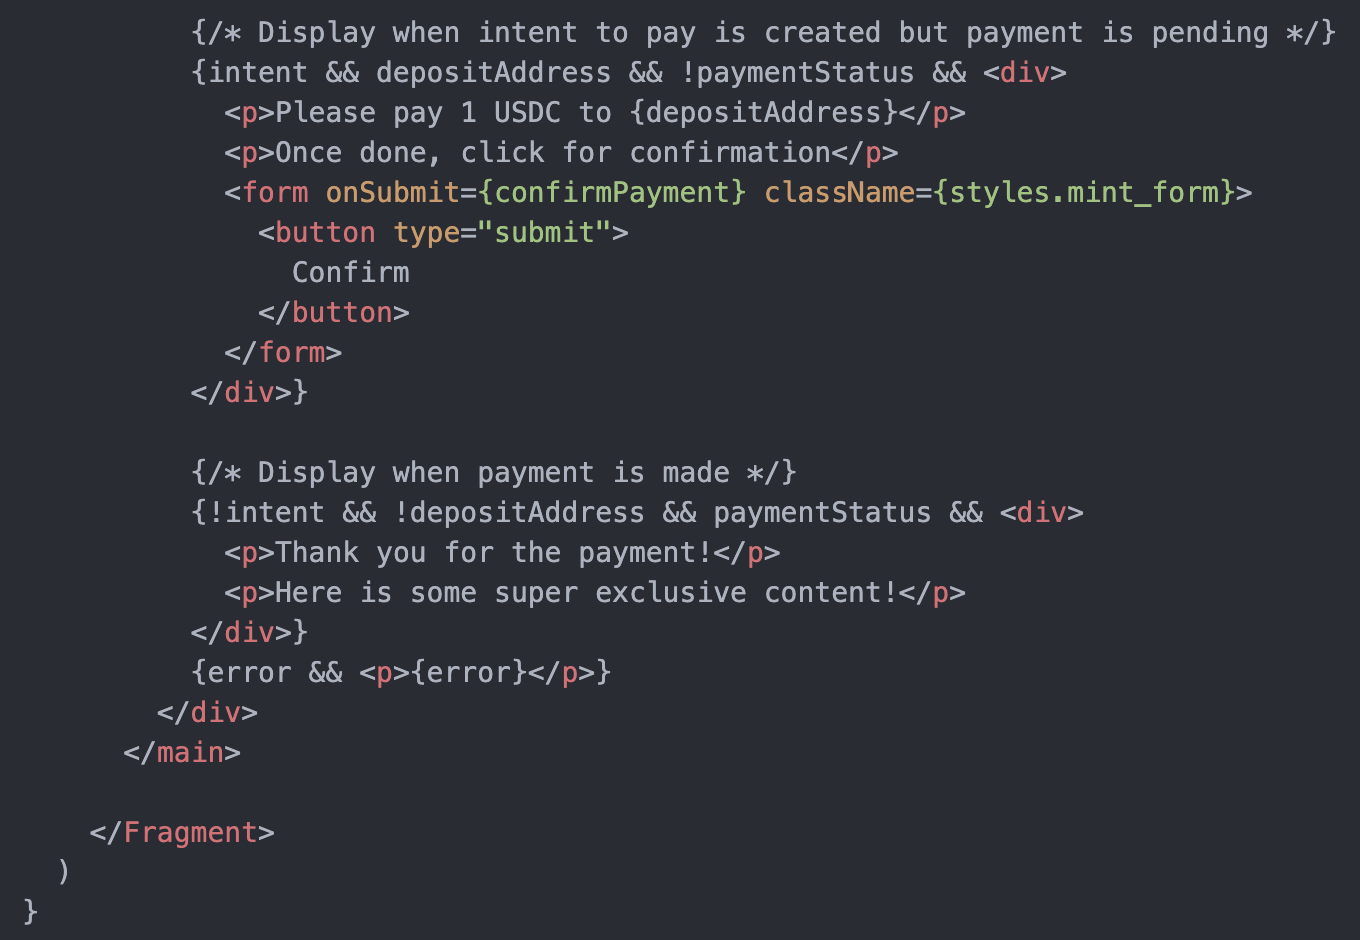
- Once the intent creation is complete, inform the user that they need to make a 1 USDC payment to a particular address.
- User makes payment through MetaMask.
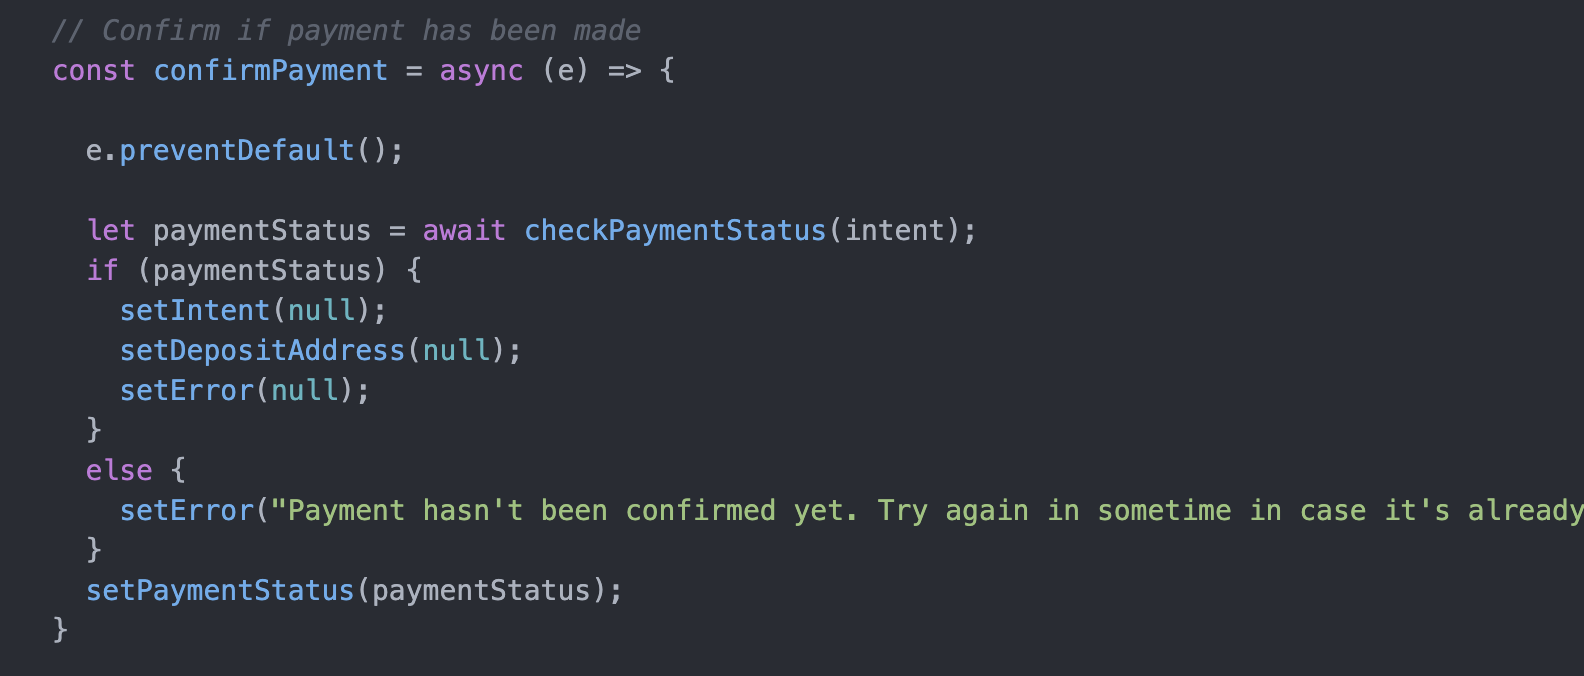
- Once the payment is made, the user clicks Confirm. The payment confirmation flow is activated.
- If payment is confirmed, the token gated content is displayed.
In the index.js file, add the following code:
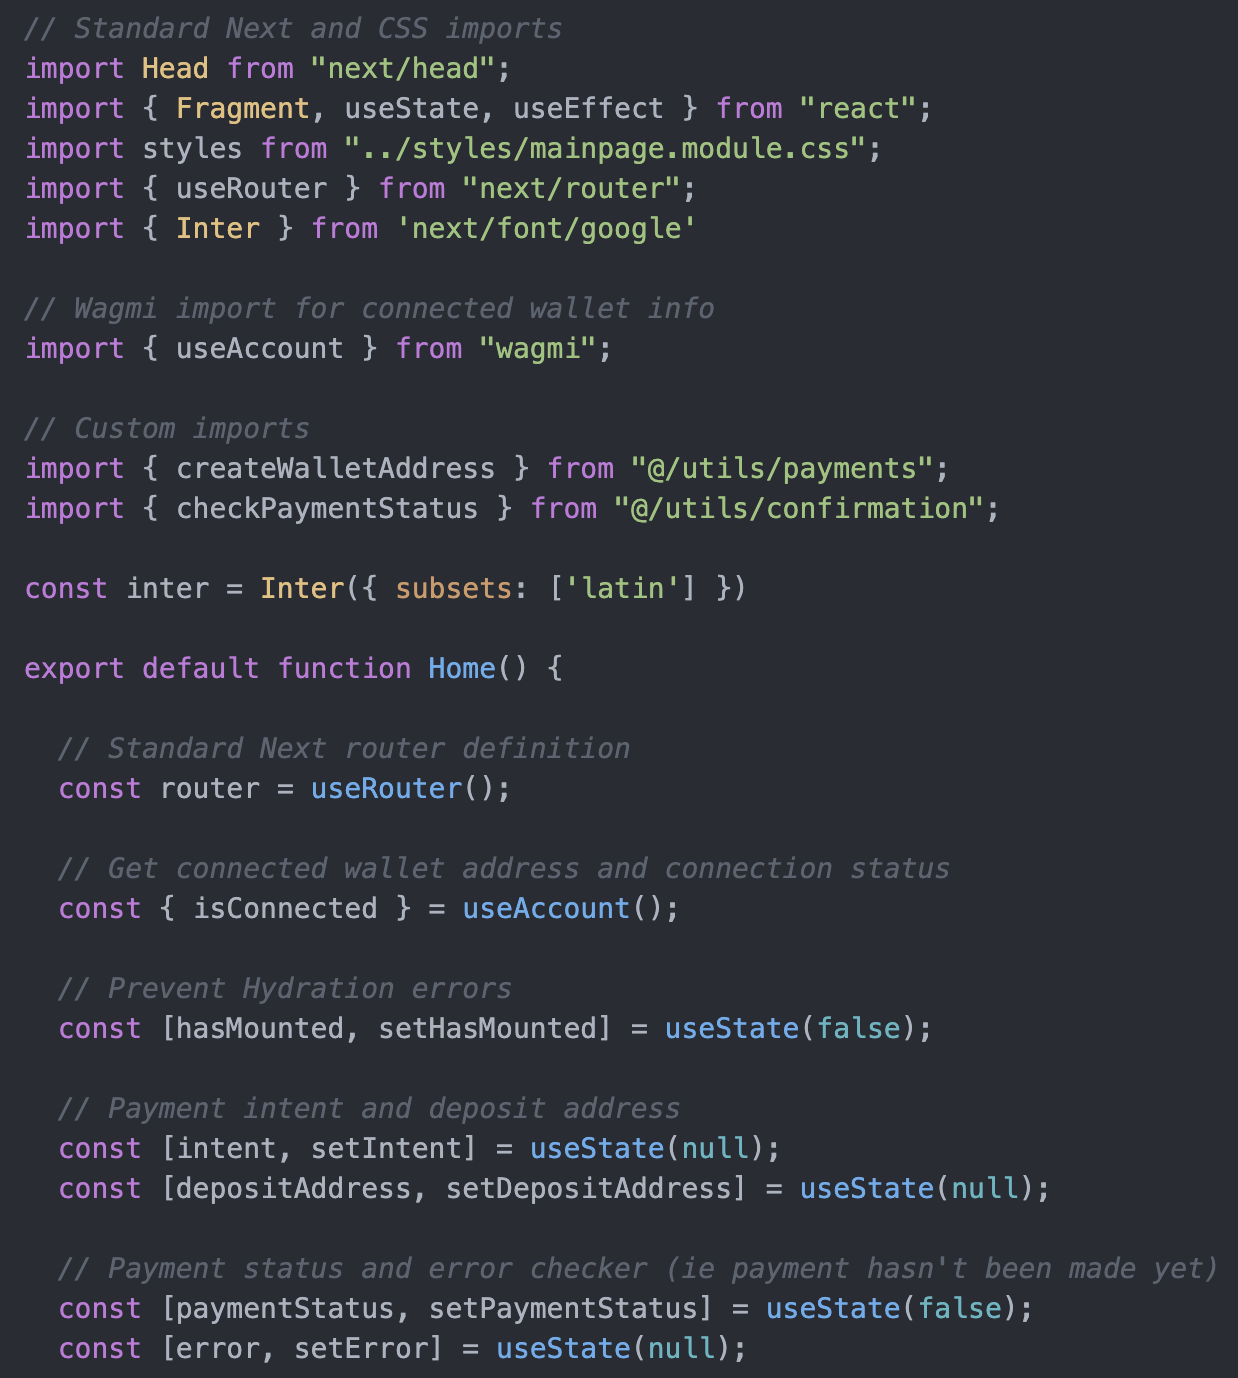
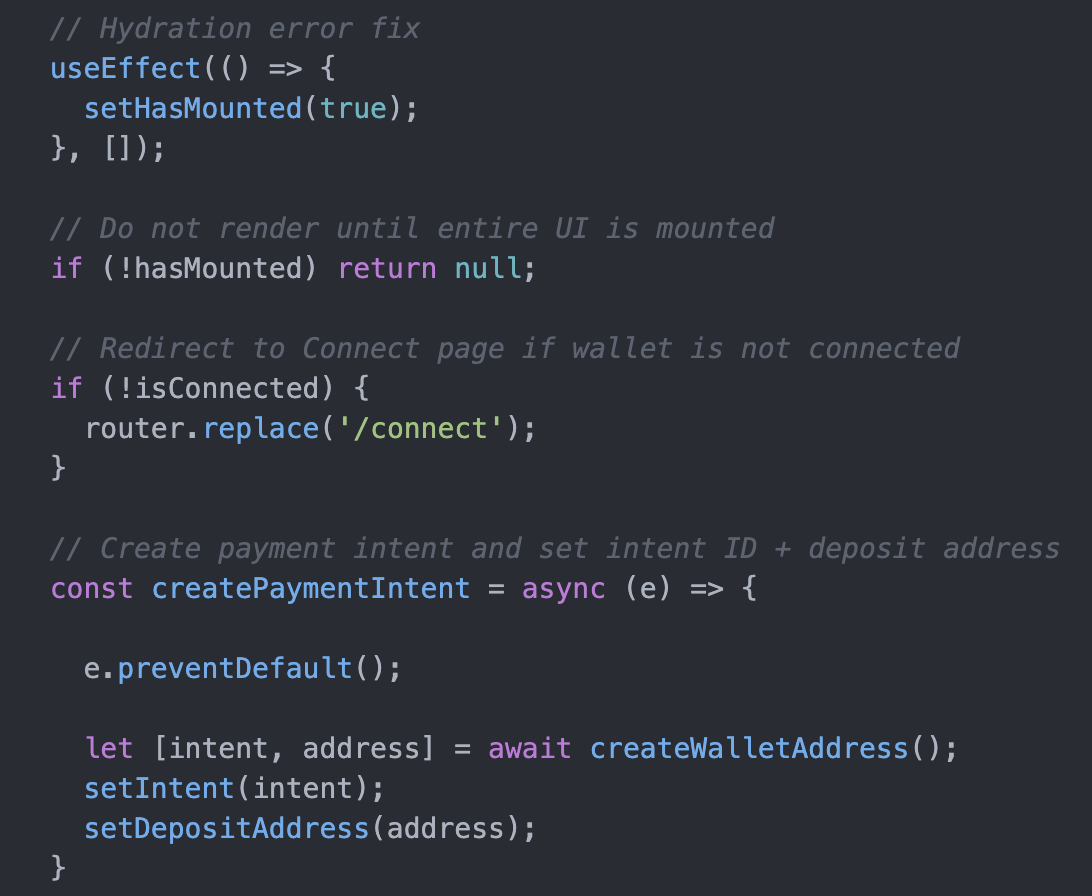
Note a couple of key sections of code above:
- `createPaymentIntent` is triggered when we click on the Pay 1 USDC button. This will create a payment intent and set the intent ID and deposit address on the frontend.
- `confirmPayment` is triggered when we click the Confirm button. This will use the payment intent ID created in (1) and check if a payment has been made.
If your app is not running already, do so by running:
$ npm run devStep 6: Test the app
Now we’re ready to test! Navigate to localhost:3000.
Unless you’ve connected your wallet from a previous test, you should see the following screen at /connect:
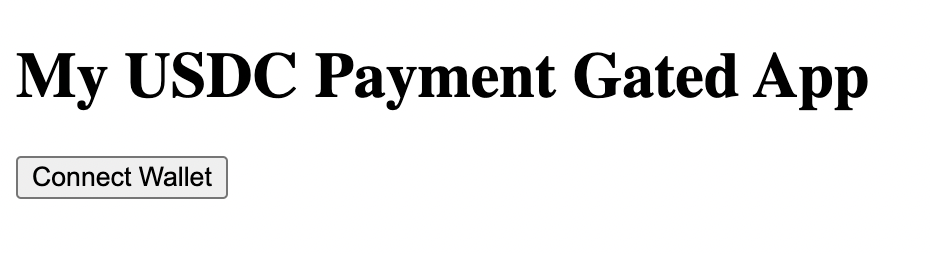
Clicking on Connect Wallet will prompt MetaMask to ask you for permission to do so.
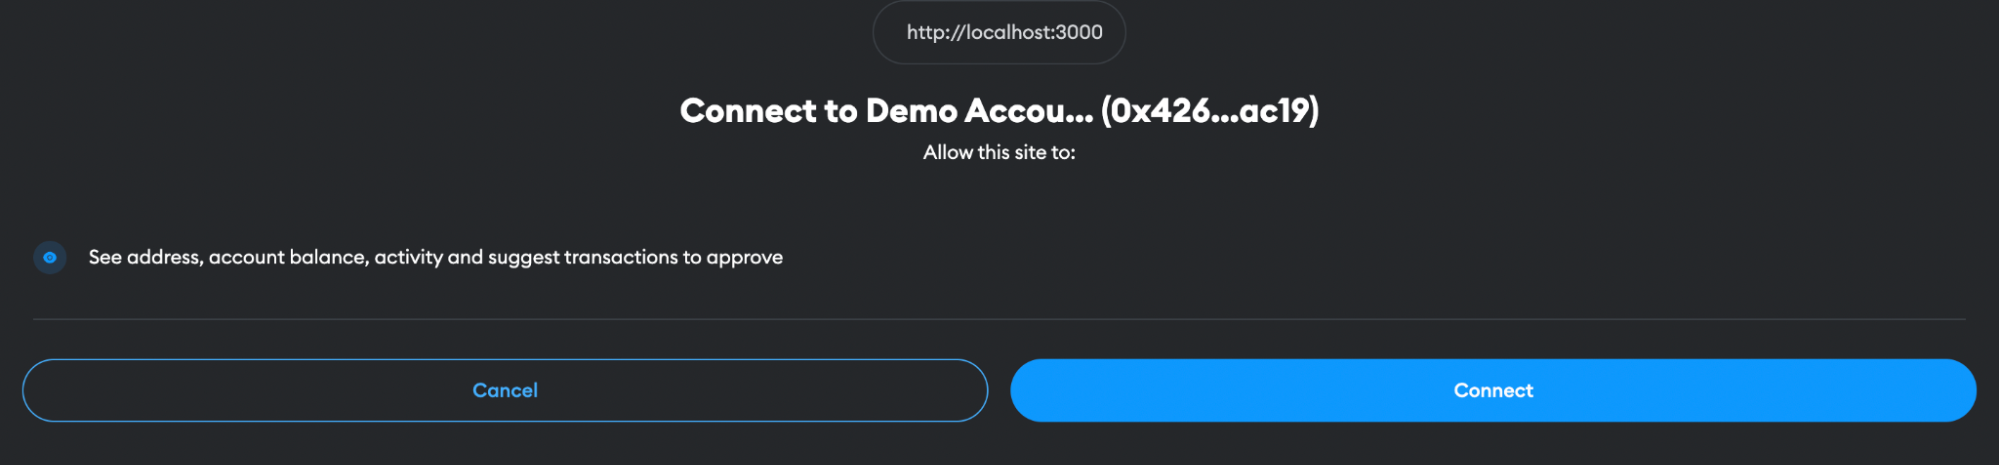
Once connected, you will be redirected to the main page.
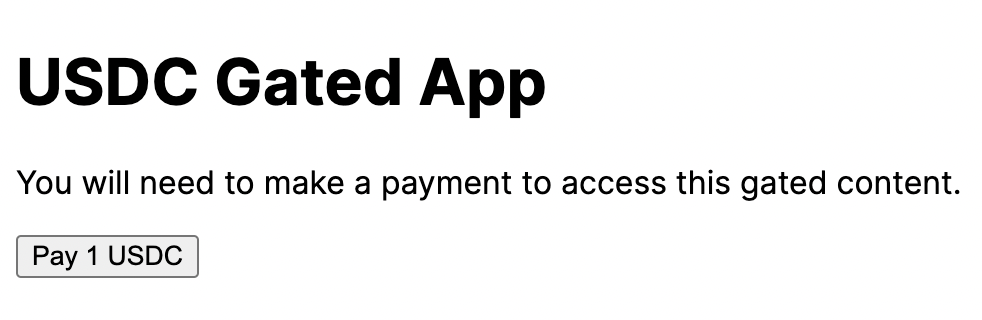
Clicking on Pay 1 USDC will trigger a payment intent creation request. After a few seconds, you should see the contents of the app replaced by something like this:

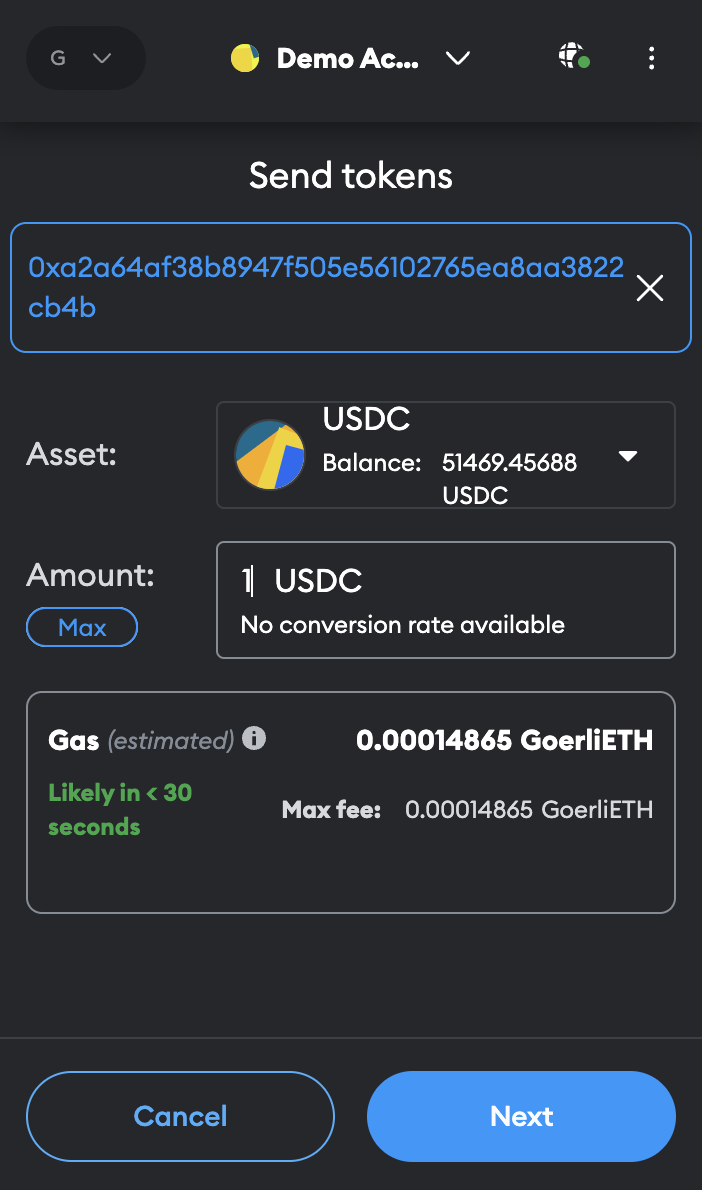
Next, pay 1 USDC from your MetaMask wallet to the address listed above:
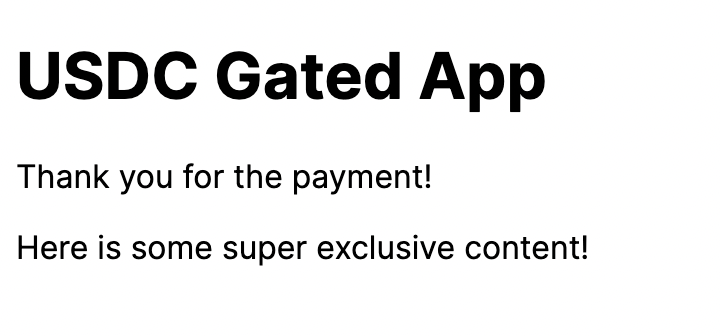
Once the payment has been made, click on Confirm. You should consequently see something like this:
If you don’t see this result, click on Confirm after a few seconds. It takes up to a minute for the payment to register.
Make improvements
That’s it! While there was some code involved, it was straightforward. Using the Circle libraries, it was easy to add the ability to accept USDC payments to our app.
Of course, this is still just a starter app. Here are a few ideas for making this a production-worthy app:
- Better UX
Obviously we’ve created a very simple UX. You’ll want to add more feedback markers to let the user know where they are in the flow (for example, payment intent being created, etc.). - Preserve payment information
As is it now, if you refresh the page you’ll need to make a payment again. For persisting which wallets have paid, you’ll need to set up a simple database and store wallet addresses. - Introducing backend gating
At the moment, the content is available in the frontend code. So someone with knowledge of Next and HTML could extract the information from the source code without paying. A potential fix would be to have an API serve the content. This API would only serve content once it verifies that a wallet has made payment and the user actually holds the wallet (which can be verified using digital signatures).
Conclusion
Using Circle’s libraries, we’ve built an app that implements stablecoin payments in just a few hundred lines of code. This simple integration opens your infrastructure to all the power of USDC and stablecoins—payments that are near-instantaneous, completed at near-zero cost, and available to more people in more places.
Ready to get started? Our free Circle Mint account enables eligible enterprise developers to directly access USDC from Circle and experience the benefits of near instant and cost effective payments.